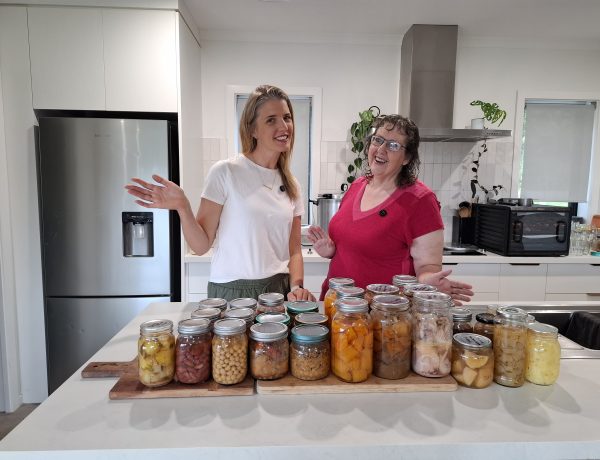
As an Introduction to Canning for Beginners Guide to Food Preservation for gardeners, there’s nothing more satisfying than watching your vegetable garden flourish. From tomatoes to beans, zucchini to carrots, the bounty from your garden can be overwhelming at times.
That’s when canning and preserving come in handy. Canning is not only a fantastic way to preserve your harvest but also an easy way to minimize food waste and ensure you have homegrown goodness to enjoy all year round. If you’re new to the world of canning, I hope that this guide will offer you a solid introduction to canning and give you the confidence to preserve your vegetables and fruit safely.

Canning may seem like a daunting task at first, but it’s a lot more approachable than you might think. Whether you’re dealing with a surplus of tomatoes, beans, or plums, Canning for Beginners is a great way to enjoy your harvest long after the season has passed. This article will give you a beginner’s roadmap on how to safely preserve your vegetables, and how different types of canning methods work, ensuring that you’re equipped with the knowledge to get started.
What is Canning, and Why Do It?
What Is Canning?
At its core, Canning for Beginners is a method of preserving food by sealing it in jars and heating it to kill bacteria, yeasts, and molds that could cause spoilage. This process also creates a vacuum seal, ensuring that your food stays safe for long periods without refrigeration. Canning allows you to store homegrown vegetables (and other foods) for months or even years, without the need for artificial preservatives.
Where did it all Begin? Brief History of Canning
The story of canning dates back to the early 19th century. The method was born out of necessity during the Napoleonic Wars.
Napoleon Bonaparte offered a cash prize to anyone who could come up with a way to preserve large amounts of food for his army. In 1809, a Frenchman named Nicolas Appert came up with the revolutionary process of sealing food in glass jars and heating them to preserve their freshness. This discovery won him the prize and marked the beginning of modern Canning for Beginners.
It wasn’t until much later that canning technology advanced, and today, it’s a staple method of food preservation across the globe.
How Canning Works (The Science Made Simple)
Canning for Beginners works by applying heat to food in sealed jars, which eliminates microorganisms like bacteria, molds, and yeasts that can lead to spoilage. The process involves the following steps:
- Preparation: The food is prepared and placed into sterilized jars.
- Sealing: The jars are sealed with lids that form a vacuum when heated.
- Heating: The jars are heated to the appropriate temperature to kill harmful bacteria and other microorganisms.
- Cooling: After heating, the jars are allowed to cool. As they cool, they form a vacuum seal that helps preserve the food.
The heat creates the vacuum seal and prevents air from entering, which would cause the food to spoil. Each type of food requires a specific temperature and processing time to ensure it’s safe for long-term storage.

Types of Canning
There are several methods of canning, each suited for different types of food. Here’s a breakdown of the most common types of canning:
Water Bath Canning
Water bath Canning for Beginners is ideal for high-acid foods such as tomatoes, fruits, and pickles. In this method, jars are submerged in boiling water for a specified amount of time. This method works because the high acidity of these foods prevents the growth of harmful bacteria, so it’s safe to use for these types of produce.
Pressure Canning
For low-acid foods like vegetables, meats, and poultry, pressure canning is required. This method uses a pressure canner to increase the temperature above boiling, reaching the higher temperatures necessary to kill bacteria, such as botulism, which can grow in low-acid foods.
Steam Canning for Beginners
Steam canning is similar to water bath canning, but instead of submerging jars in boiling water, they’re placed in a steam canner, where the heat and steam create the vacuum seal. This method is newer and not as widely used but is considered a safe and effective alternative to water bath canning, particularly for fruits and tomatoes.
Oven Canning (Not Recommended)
Although oven Canning for Beginners used to be popular, it is no longer considered a safe method for preserving food. The heat from the oven can be uneven, and it’s difficult to achieve the necessary temperature to kill bacteria effectively. It’s important to note that oven canning is not recommended by any major food preservation organizations.

A Note on High Acid Food vs Low Acid Food
High-acid foods, like fruits and pickles, are naturally more resistant to bacterial growth due to their low pH (below 4.6). This makes them safe for water bath canning, where the boiling water (212°F) can kill most microorganisms. Low-acid foods, such as vegetables and meats, require higher temperatures to prevent botulism, which is why they need pressure Canning for Beginners to reach the necessary heat for safe preservation.
Canning Safety
In this introduction to Canning for Beginners, it’s important to talk about canning safely to ensure the practice is done safely and effectively. It’s critical to follow safety guidelines to ensure that your home-canned foods are safe to eat and free from harmful bacteria. Here are some expanded safety tips to help you can with confidence:
Botulism Risk:
- While the risk is low, it’s important to be aware of botulism, a rare but potentially fatal form of food poisoning caused by bacteria that can grow in improperly canned low-acid foods like vegetables, meats, and poultry.
- Botulism thrives in environments without oxygen, which is why it’s essential to use the correct Canning for Beginners method. For low-acid foods, always use a pressure canner to reach the necessary high temperatures to destroy the bacteria.
Pressure Canner Safety:
- Modern pressure canners have built-in safety features such as pressure release valves, which make them incredibly safe to use. While older models had a reputation for blowing up, today’s models are much more reliable and include multiple safety mechanisms.
- Always ensure your pressure canner is in good working order. Check the pressure gauge annually (for dial-gauge models) and follow all manufacturer instructions carefully. Avoid forcing the lid open or adjusting the pressure while it’s in use.
Use the Correct Method for the Right Food:
- High-acid foods like fruits, tomatoes, jams, and pickles can be safely preserved using the water bath Canning for Beginners method. For low-acid foods like beans, carrots, and meats, you must use a pressure canner to reach the necessary temperature.
- If you’re unsure whether your food is high or low acid, do some research or consult a trusted canning guide to determine the right method for each type of food.

Properly Seal Jars:
- The vacuum seal is what keeps your food safe from contamination, so it’s vital to make sure your jars are sealed properly. Once sealed, check for any signs of failure, such as bulging lids or jars that don’t “pop” when opened.
- If a jar doesn’t seal properly, it’s best to refrigerate the contents and use them within a few days.
Understand Your Equipment:
- If you’re using a dial-gauge pressure canner, it’s essential to have the gauge tested every year to ensure it’s functioning correctly. A faulty gauge could result in unsafe Canning for Beginners temperatures.
- If possible, use a weighted-gauge pressure canner, which is simpler and doesn’t require annual testing.
Don’t Rush the Process:
- Canning for Beginners is a science, and it’s important to follow every step carefully. Rushing through the process or skipping steps (such as preheating jars or processing for the correct amount of time) can result in improperly sealed jars and unsafe food.
Know Which Foods Are Safe to Can:
- Not all foods are suitable for Canning for Beginners, and some require special attention. For example, dairy products, most grains, and some vegetables should never be canned at home. Always use trusted canning resources to verify whether a food is safe to can.
By following these safety tips, you’ll drastically reduce the chances of any issues and can enjoy the fruits of your labor with peace of mind. Canning is a safe practice as long as you adhere to the established guidelines and use the right equipment.
Supplies Needed to Start Canning

Before you dive into the world of Canning for Beginners, it’s essential to gather the right tools. Here’s a list of the basic supplies you’ll need to get started:
- Canning Jars: You’ll need high-quality glass jars with tight-fitting lids. Make sure the jars are designed for canning purposes, as they’re thicker than regular glass jars.
- Lids and Rings: Jars require both a flat lid and a metal ring. The lid forms the vacuum seal, while the ring holds it in place during the canning process.
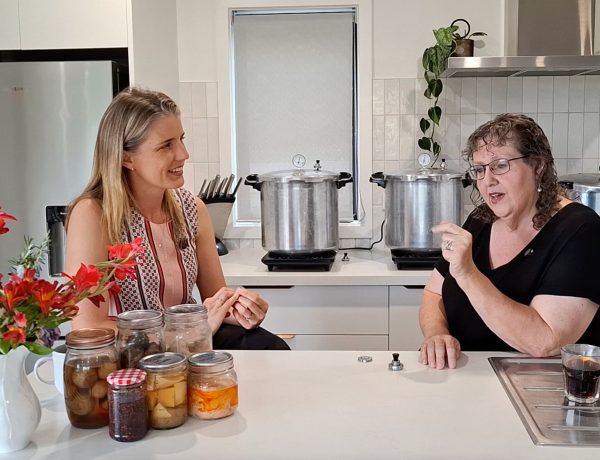
- Canning Pot or Pressure Canner: A large pot is needed for water bath canning, while a pressure canner is essential for canning low-acid foods. Ensure your pressure canner has a gauge to monitor the pressure.
- Jar Lifter: This tool makes it much easier and safer to remove hot jars from the boiling water or pressure canner.
- Funnel: A wide-mouth funnel helps you pour food into jars without making a mess.
- Bubble Remover/Headspace Tool: This tool helps you remove air bubbles from the jars and ensures proper headspace (the gap between the food and the lid).
- Tongs: Tongs are used for lifting lids and jars out of the water, particularly in water bath Canning for Beginners.
- Timer: Accurate timing is crucial in canning to ensure that your food reaches the right temperature for proper preservation.
- Clean Towels: You’ll need clean towels to wipe jar rims before sealing them.
Once you’ve gathered your supplies, you’re ready to start canning. The process may seem overwhelming at first, but once you get into the rhythm, it becomes second nature.
Storing and Using Your Canned Vegetables
Once your vegetables are safely canned and sealed, storing them properly is just as important as the Canning for Beginners process itself. Store your jars in a cool, dark, and dry place, such as a pantry or cupboard. Avoid storing them in areas exposed to heat or direct sunlight, as this can affect the quality of the food over time.
When you’re ready to enjoy your preserved vegetables, check for the seal. If the lid has remained tightly sealed, you can open the jar and use the contents. Canned vegetables can last for up to a year (or longer, depending on the food).

FAQs on Introduction to Canning
Who invented canning?
Canning for Beginners was invented by a Frenchman named Nicolas Appert in the early 1800s. Napoleon’s army needed a better way to store food, so the government offered a cash prize for a solution—and Appert figured out that heating food in sealed containers could keep it safe for months. He used glass bottles sealed with corks and wax—pretty high-tech for the time!
What are the principles of Canning for Beginners?
Canning for Beginners is built on three key principles:
- Heat – to kill microorganisms that cause spoilage or illness.
- Sealed Environment – to keep new bacteria out and prevent recontamination.
- Acidity + Processing Time – foods with higher acidity can be safely canned at lower temps (water bath), while low-acid foods need higher temps (pressure canning) to kill harmful spores like Clostridium botulinum.
How does canning work?
You pack food into sterilized jars, seal them with a lid, and process them in a water bath or pressure canner. The heat kills bacteria and drives air out of the jar. As the jar cools, a vacuum seal forms—locking out air and keeping the food safe and shelf-stable.
Why is it called canning if we’re using glass jars?
Great question—and yes, it’s kind of funny! The term “canning” comes from the early 1800s when food was first preserved in tin cans, not jars. Even though most home canners use glass jars now, the name stuck. So, “canning” is really just shorthand for the whole process of preserving food in sealed containers.
Do I need to boil jars before canning?
Not necessarily! If you’re processing jars for 10 minutes or more, the heat during Canning for Beginners sterilizes them. But you do want to start with clean jars—either fresh from the dishwasher or washed in hot, soapy water. If your recipe calls for less than 10 minutes of processing (uncommon but possible), you should sterilize the jars first by boiling them for 10 minutes.
Conclusion: Get Started with Canning Vegetables
Canning vegetables is a fantastic way to extend the shelf life of your garden produce and enjoy fresh, homemade food throughout the year. Whether you’re preserving your tomatoes, beans, or carrots, Canning for Beginners ensures that you’ll always have healthy, homegrown options available. With a little practice, you’ll master the basics of canning and be able to preserve your harvest year round!
Starting your Canning for Beginners journey might seem overwhelming, but remember—start somewhere. You don’t have to can every vegetable at once, and it’s okay to experiment and learn as you go. This introduction to canning guide offers the essential information you need to begin canning vegetables and enjoy your homegrown harvest year-round.
If you’re interested in more beginner-friendly gardening advice, check out my tips on growing your own food in an apartment or in your backyard. Whether you have a small backyard or just a few pots on a balcony, you can grow, harvest, and preserve your own food, taking your gardening skills to the next level.

About the Author
Elle Reed is a passionate gardener and advocate for teaching beginner gardeners how to grow their own food. Elle’s mission is to inspire and empower people to get back to basics, grow their own produce, and embrace a sustainable lifestyle. “Whether it’s a few herb pots in an apartment, a potager or a full garden plot, we can all ‘start somewhere’ to grow our own food, and in doing so, provide healthier food for ourselves and those we love”.